当我还是小白时(比现在更白的时候)对于 UITableViewCell 的行高问题还是比较头疼的,当然这个算是 iOS 开发中相当基础的内容了,但是当时的我就想过,将 UITableViewCell 的行高问题解决了一定写一篇总结博客,所以就有了这篇博客。尽管拖了这。么。久。。。
iOS 的界面中,UITableView 应该是用的最多的控件之一了吧:微信列表、聊天记录、朋友圈、微博 time line。。。哪哪离不开 UITableView。而 UITableView 则是由 UITableViewCell 组成的,这些 cell 有的行高是固定的,大部分则需要根据内容反计算行高来展示。本篇博客则来介绍 UITableViewCell 计算行高的几种方式。
固定行高
有相当一部分 UITableView 的行高是固定的,这种 cell 在代码书写和代码性能上相比而言就简单了许多,有以下两种方式设定行高:
统一设定
1 | self.tableView.rowHeight = 44; // 系统自带的 cell 的行高大概就是 44 |
- 优点:这种方式最为简单。
- 缺点:相对的对 tableView 的可控性也最弱,它会将 tableView 所有的 cell 高度统一设置为 44。
通过代理设定
通过实现 UITableViewDelegate 方法,同样可以控制 tableView 的行高。
1 | - (CGFloat)tableView:(UITableView *)tableView heightForRowAtIndexPath:(NSIndexPath *)indexPath { |
- 优点:采用这种实现代理的方法可以对不同的 tableView 、tableView 中不同的 section、row,进行判断分别设置,可控性更强。
- 缺点:因为在每次展示 cell 时都会调用了一次该代理方法,所以较于第一种方法一些性能损耗。
这个缺点在苹果介绍 rowHeight 属性的文档里也有指明:
There are performance implications to using tableView:heightForRowAtIndexPath: instead of rowHeight. Every time a table view is displayed, it calls tableView:heightForRowAtIndexPath: on the delegate for each of its rows, which can result in a significant performance problem with table views having a large number of rows (approximately 1000 or more).
所以,如果你的 tableView 的行高是统一的、固定的,那么最好采用第一种方法,直接设置 rowHeight。
不定行高
固定行高的 tableView 已经算是小儿科了,但是也属于 UITableViewCell 行高的范畴,所以还是简单提了一下。
那么,当 tableView 的行高不固定时,有以下几种计算方式。
估算行高
其实,UITableView 的 rowHeight 可以设置为 UITableViewAutomaticDimension,顾名思义,cell 可以设置为自动计算行高。然而,仅仅将 rowHeight 设置为 UITableViewAutomaticDimension 对自计算行高是不起效的,这时候就需要另一个属性:estimatedRowHeight。
iOS8 苹果推出了 self-sizing 的概念。UITableView 在 iOS7 就增加了一个属性: estimatedRowHeight ,苹果是这样描述的:
Providing a nonnegative estimate of the height of rows can improve the performance of loading the table view. If the table contains variable height rows, it might be expensive to calculate all their heights when the table loads. Using estimation allows you to defer some of the cost of geometry calculation from load time to scrolling time.
When you create a self-sizing table view cell, you need to set this property and use constraints to define the cell’s size.
The default value is 0, which means there is no estimate.
你可以使用这个属性来给 cell 估算行高,但是默认值为 0,不会进行估算。
所以如果想开启估算行高的话,必须设置 estimatedRowHeight,如:
1 | self.tableView.estimatedRowHeight = 60; |
将 estimatedRowHeight 设置为一个大概的估计行高值即可,没有严格的限制。比如你的 cell 高度大概在 50 到 100 之间,那么你可以将 estimatedRowHeight 设置为 75;
rowHeight 的默认值为 UITableViewAutomaticDimension,所以第二行可以省略。
然后就是对你的 cell 进行布局设置,这里以 Masonry 为例(AutoLayout 的话,这个框架大家应该都在用吧?~)
伪代码如下:
1 | - (instancetype)initWithStyle:(UITableViewCellStyle)style reuseIdentifier:(NSString *)reuseIdentifier { |
注释①:该条约束可以注释掉,然后将 label1 设置为 [label1 setNumberOfLines:0]; 这样 label1 就可以根据内容自动计算高度。
注释②:必须设置该条约束。为了确定 cell 的高度,最接近 cell bottom 的控件需要设置一个距离 cell bottom 的约束。
布局结果大概是这样的效果: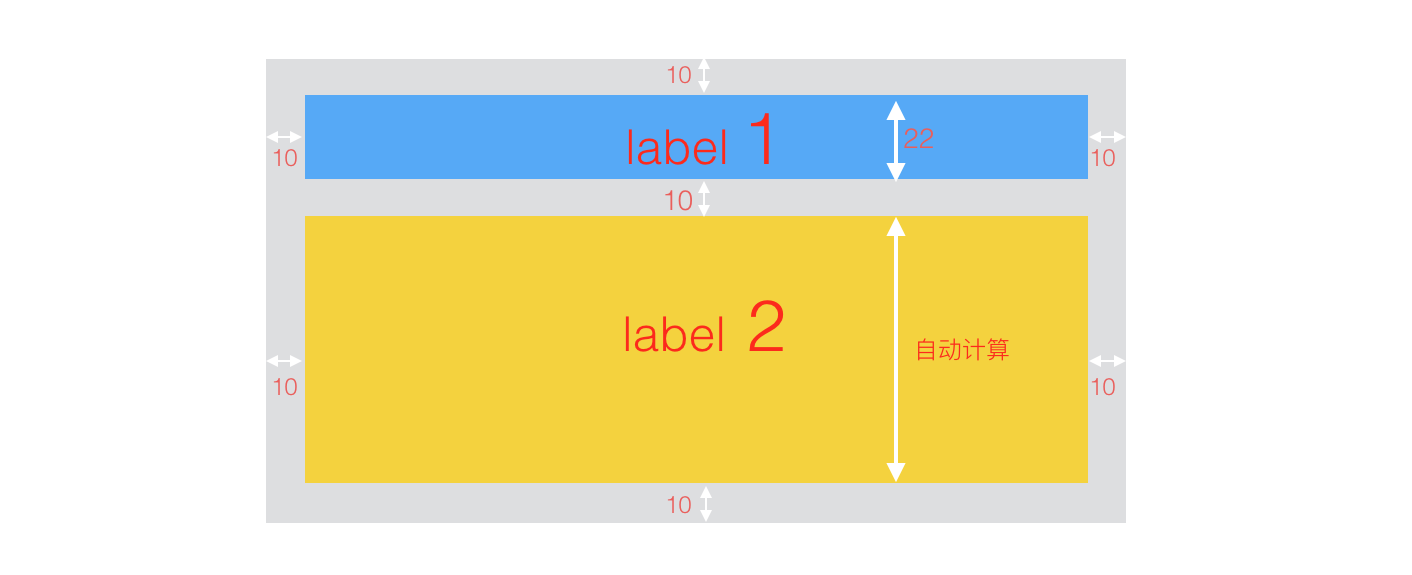
- 优点:代码书写简单,页面布局快捷。在 cell 的
initWithStyle:方法里就已经新建各个控件并将位置设置好,并且不需要单独计算 cell 的高度。 - 缺点:效率低,稍微复杂些的页面就能感觉到 tableView 滑动时的掉帧。
代理计算行高
首先来执行一波伪代码,用打印来观察各个代理方法的执行顺序:
1 |
|
控制台打印结果如下: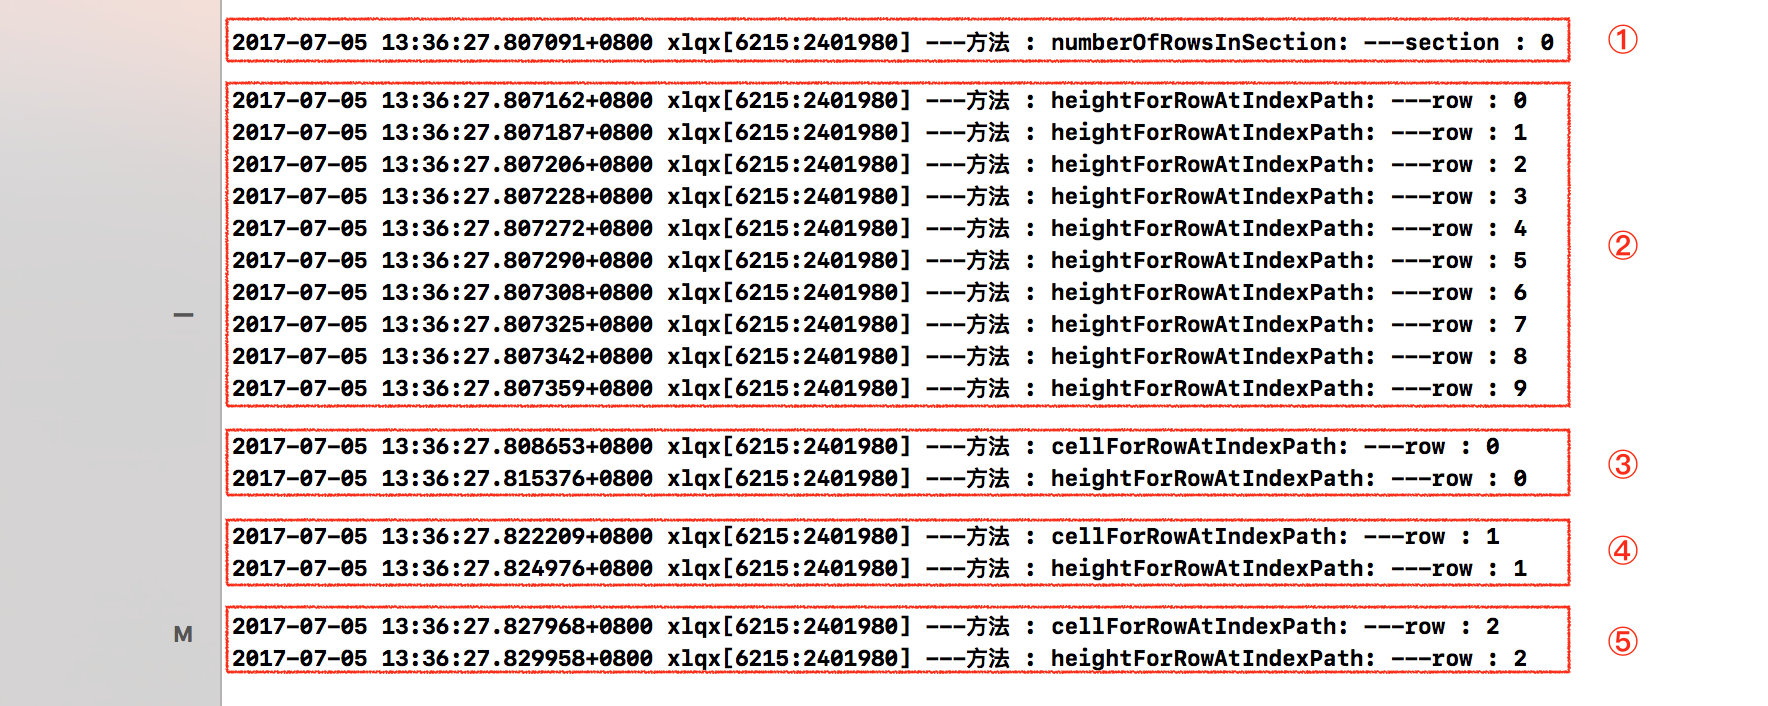
①:首先执行 numberOfRowsInSection: 方法,返回 cell 个数为 10。
②:其次执行的就是 heightForRowAtIndexPath: 方法,如上图,此时执行该方法会将所有 cell 的高度全部返回。
③④⑤:这时候就开始执行 cellForRowAtIndexPath: 方法,因为当前页面只能布局 3 条 cell,所以该方法会被执行三次。并且,执行一次 cellForRowAtIndexPath: 方法紧接着就会执行一次 heightForRowAtIndexPath: 方法返回 cell 高度。
因此,当我们从网络或者本地缓存中获取到所需数据( array )后,可以直接执行代码:
1 | [self.tableView reloadData]; |
然后就会调用 cellForRowAtIndexPath: 方法和 heightForRowAtIndexPath: 方法。
cell 的 initWithStyle: 方法:
1 | - (instancetype)initWithStyle:(UITableViewCellStyle)style reuseIdentifier:(NSString *)reuseIdentifier { |
我们可以在 cellForRowAtIndexPath: 方法进行 cell 布局,如:
1 | - (UITableViewCell *)tableView:(UITableView *)tableView cellForRowAtIndexPath:(NSIndexPath *)indexPath { |
布局结果大概是这样的效果: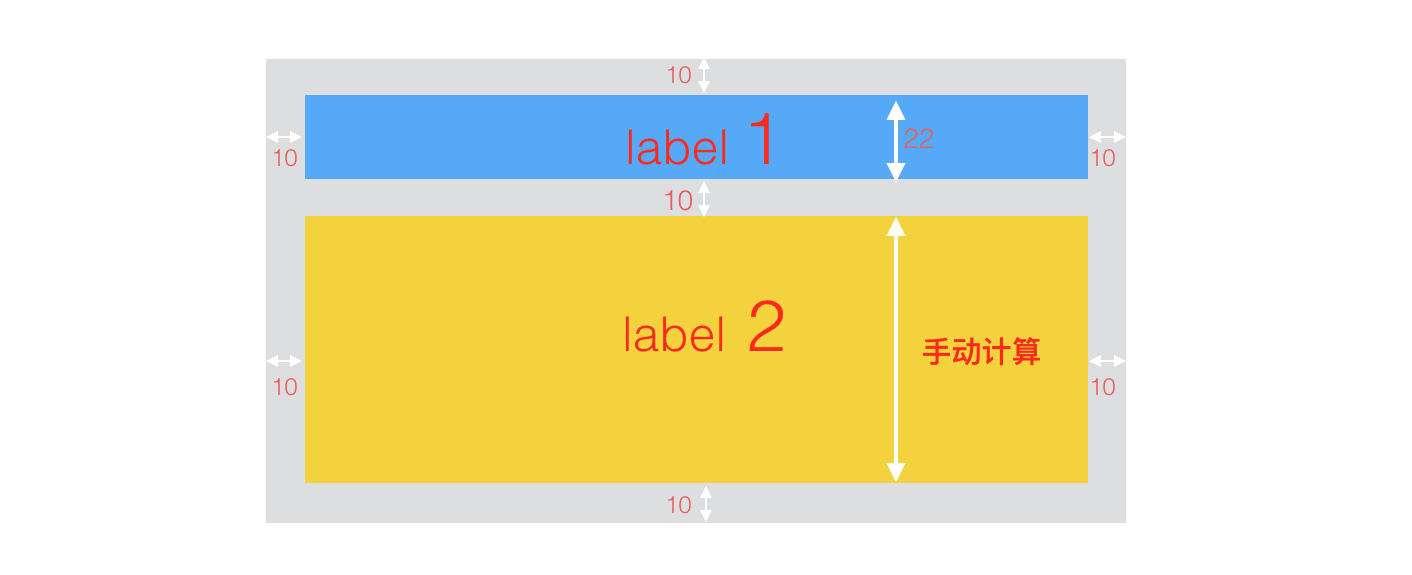
然后在 heightForRowAtIndexPath: 方法里根据 array 数据计算 cell 的高度,如:
1 | - (CGFloat)tableView:(UITableView *)tableView heightForRowAtIndexPath:(NSIndexPath *)indexPath { |
- 优点:通过 feram 的方式能够提高布局效率
- 缺点:因为每次 cell 将要出现时都去执行一次
heightForRowAtIndexPath:所以效率还是不够高,而且行高没有得到缓存,造成大量不必要的计算上的浪费。所以就有了下边这种方法。
提前计算行高
这种方式是出自 MVVM 的产物,因为最近都在使用 MVVM 框架,所有的计算都放到了 viewModel 里,所以在 viewModel 从网络或者本地缓存拿到数据后接着就会处理,将原始数据处理封装成 cell 的 VO(view object) 类对象,该 VO 类里包含着 cell 所需要的展示内容和尺寸,如:
1 | @interface TableViewCellVO : NSObject |
然后将处理好的 cellVOArray 传给 UITableView 的数据源和代理,在 cellForRowAtIndexPath: 方法直接赋值:
1 | - (UITableViewCell *)tableView:(UITableView *)tableView cellForRowAtIndexPath:(NSIndexPath *)indexPath { |
在 heightForRowAtIndexPath: 方法里直接返回行高:
1 | - (CGFloat)tableView:(UITableView *)tableView heightForRowAtIndexPath:(NSIndexPath *)indexPath { |
- 优点:行高与 cell 内的各控件尺寸都提前计算好,在执行
cellForRowAtIndexPath:方法和heightForRowAtIndexPath:方法时比较快,且行高得到缓存,避免了冗余的计算。 - 缺点:在从网络或者本地缓存拿到数据之后,执行
[self.tableView reloadData];之前需要花费时间处理数据及计算 fream。这里需要谨慎处理数据,可以采用多线程等技术缩短数据处理的时间。
因为在数据处理上所花费的时间要远小于页面滚动时所消耗的时间。凡是涉及页面的操作都是相当耗费时间的,相比而言对于 cpu 在处理数据上的时间就可以忽略不计了,毕竟我们所要处理的数据都不会太大,如果数据过多的话可以做分次获取处理(下拉刷新操作),所以这里的缺点相对于上一种方法还是可以忍受的。
XIB 方式处理 UITableViewCell 的行高问题
对于纯 Code 和 SB 方式的页面布局问题业界已经相爱相杀了很久,各有各的道理。我的观点是:哪种布局方式适合自己就好了,看个人喜好。相比于 SB 的“所见即所得”,快速布局等,我个人更喜欢纯 Code 的方式,对代码的可控性更强(亦不排除我个人是比较喜欢 Coding 的因素)。
不过,如果你是偏好 SB 的布局方式,采用 XIB 方式处理 UITableViewCell,那么你可以看看sunnyxx 的 UITableView-FDTemplateLayoutCell(点击可查看GitHub)这种解决方案。
而且,本文的前一部分也参考了 sunnyxx 的这篇博客 优化UITableViewCell高度计算的那些事
,推荐阅读。